00:00:09fire by squishing air in this project
00:00:12we’re building a tool that does exactly
00:00:13that and with a little bit of
00:00:15resourcefulness we can make this for
00:00:17under a buck
00:00:20[Music]
00:00:33the materials for this project cost me
00:00:36less than a dollar I got these pieces of
00:00:38scrap acrylic for free and besides those
00:00:40all I’m going to need are a couple of
00:00:41rubber o-rings a one and a half inch
00:00:43bolt and this handle I got off a
00:00:45lawnmower this piece of clear acrylic
00:00:47rod fits perfectly into this tube so I’m
00:00:49ready to form the piston I’ll use a ten
00:00:51inch piece of rod and secure it into the
00:00:53Chuck of my drill press a hacksaw is my
00:00:55tool of choice for cutting a groove in
00:00:57the plastic rod and with a bit of
00:00:58guesswork I’ve made it just big enough
00:01:00to fit this o-ring securely leaving the
00:01:02rubber edges slightly wider than the rod
00:01:04next I’ll place the rod in a bench vise
00:01:06protected with a terry cloth and when
00:01:08it’s secured use a 3/16 drill bit to cut
00:01:10a hole right through the side it’s a
00:01:12clean cut and the spacing is about
00:01:13quarter inch from the o-ring so I’ll
00:01:15proceed to my chop saw and make a cut
00:01:17just barely touching the top of the hole
00:01:19this has just created a claw that will
00:01:21hold my tender it’s time to cut these
00:01:22pieces to length so I’ll mark them at 6
00:01:24inches and cut them together while I’m
00:01:26here I may as well cut an inch off the
00:01:28tubing and a small square piece that
00:01:29I’ll use in a minute okay I’ve got all
00:01:31my pieces cut to length so now I’ll
00:01:33remove the protective paper from this
00:01:35little square and carefully cement it to
00:01:37one end of the tubing this will need to
00:01:39be an airtight seal and I’m hoping this
00:01:40weight on top will help with that
00:01:42setting I can get back to making the
00:01:44piston this time I’m using my drill
00:01:46press and a quarter inch bit to drill a
00:01:47hole down the inside of the rod my goal
00:01:50is to get the hole as centered as I can
00:01:51and when it’s roughly one and a quarter
00:01:53inches deep it can be transferred back
00:01:54to my bench vise for tapping this is a
00:01:575/16 coarse thread tap and I’m using it
00:01:59because it matches the threads on this
00:02:01bolt to make this handle I carefully use
00:02:03my vise and a 1/2 inch drill bit to
00:02:05hollow out the center which made a large
00:02:07cavity that I’ll be using later I
00:02:08threaded this hex bolt all the way in
00:02:10and then secured it tightly using a pair
00:02:12of pliers you can see the handle and the
00:02:14rod thread perfectly together and will
00:02:16just need to be tightened by hand a
00:02:17little acrylic cement is applied to the
00:02:19rod near the handle then the one-inch
00:02:21piece of tubing is added and cemented in
00:02:23place by dripping glue into the gaps
00:02:25this piece is to help reinforce the area
00:02:27where the handle meets the rod that’s
00:02:29setting and it looks like the tubing is
00:02:30cured enough to knock down the base on
00:02:32my belt sander
00:02:33just a minute of sanding and the base is
00:02:35rounded and looking much better
00:02:37to help it cure airtight I’ll clap it
00:02:38together and leave it overnight to
00:02:40finish off the piston all I need to do
00:02:42is slide the other o-ring into place
00:02:44and this will help cushion the acrylic
00:02:45pieces from impact with each other as
00:02:47well as create a slight gap between the
00:02:49tinder claw and the chamber base a
00:02:50little bit of lubrication is added to
00:02:52the o-ring and this $1 fire piston is
00:02:54looking awesome I even found a little
00:02:56cap that fits perfectly into the handle
00:02:58I had enough material to make another
00:03:00piston I’m gonna test the small one
00:03:02first using some char cloth I made in a
00:03:04previous video I don’t need very much
00:03:06and this little piece should work fine
00:03:07when that’s rolled up and placed in the
00:03:10grips of the tinder claw I’ll gently
00:03:11insert the rod into the chamber until
00:03:13the o-ring presses inside then with one
00:03:15swift downward stroke I’ve got ignition
00:03:17and my tinder is burning I’ll try that
00:03:20again
00:03:20and this attempt was just as successful
00:03:23by compressing the air quickly enough
00:03:25the temperature shoots up hundreds of
00:03:26degrees Celsius in a fraction of a
00:03:28second enough to ignite char cloth and
00:03:30other types of tinder into burning
00:03:32embers the cavity in the piston handle
00:03:34is perfect for storing some char cloth
00:03:36and the cap will hold it in place to see
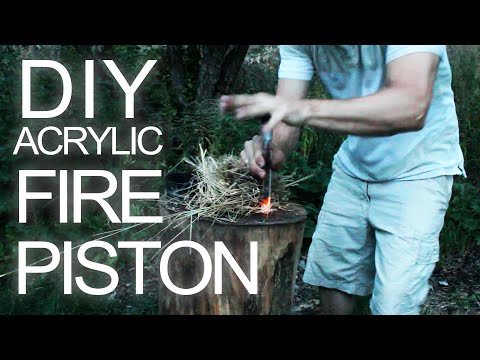
00:03:38if this will work out in the woods I’ve
00:03:40readied a tinder bundle made from dry
00:03:41grass and when my fuel is loaded I’ll
00:03:43give the piston a whack there it is I’ve
00:03:46instantly got a glowing Ember and using
00:03:48a piece of grass to transfer it into the
00:03:50nest works pretty well the heat is
00:03:51building and this little bundle almost
00:03:53explosively bursts into flames that
00:03:55happened pretty fast and before I burned
00:03:57myself I better get this over to the
00:03:59fire pit this bundle is a little damp so
00:04:01I’m adding a piece of char cloth inside
00:04:03the nest to help it develop a flame and
00:04:05there it is and it’s taking off fast
00:04:09yikes I’ve been getting ignition on
00:04:11nearly every stroke and this is proving
00:04:13to be an easy and fairly reliable way to
00:04:15start a fire without matches some people
00:04:17say this little tool was commonly used
00:04:19in the 1800s and was the inspiration
00:04:21behind the diesel engine with this tube
00:04:23being completely see-through it’s
00:04:24exciting to witness the actual ignition
00:04:26point of my fuels and for under $1 it
00:04:29was definitely a project worth the
00:04:30investment that’s another item for my
00:04:32emergency kit and a great way to see
00:04:34science in action if you liked this
00:04:36project perhaps you’ll like some of my
00:04:38others check them out at the king of
00:04:39random calm
00:04:51you
”