
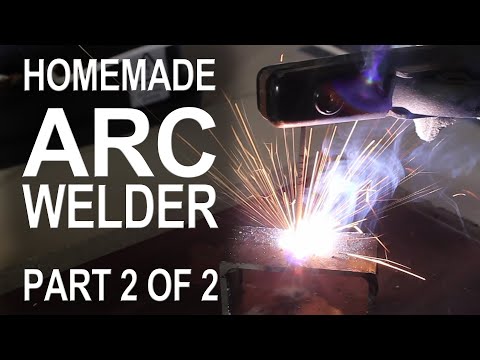
in part one of this project we scavenged some parts from household appliances and
some parts from household appliances and
some parts from household appliances and modified them so we could weld metal in
modified them so we could weld metal in
modified them so we could weld metal in this project we’ll be rigging up the
this project we’ll be rigging up the
this project we’ll be rigging up the electrical system and adding some
electrical system and adding some
electrical system and adding some finishing touches so that our homemade
finishing touches so that our homemade
finishing touches so that our homemade stick welder is ready for operation
[Music]
[Music] I started this project with a scrap
I started this project with a scrap
I started this project with a scrap piece of 3/4 inch plywood that I had
piece of 3/4 inch plywood that I had
piece of 3/4 inch plywood that I had leftover from the router table project
leftover from the router table project
leftover from the router table project and since we have a router table
and since we have a router table
and since we have a router table let’s profile the edges with a beading
let’s profile the edges with a beading
let’s profile the edges with a beading bit just because we can next let’s cut a
bit just because we can next let’s cut a
bit just because we can next let’s cut a piece of 2×2 and screw it in from the
piece of 2×2 and screw it in from the
piece of 2×2 and screw it in from the bottom so that it’s secured in the
bottom so that it’s secured in the
bottom so that it’s secured in the center and about 1 inch from the edge
center and about 1 inch from the edge
center and about 1 inch from the edge we’ll also need to drill a couple of
we’ll also need to drill a couple of
we’ll also need to drill a couple of pilot holes in the top because this is
pilot holes in the top because this is
pilot holes in the top because this is where we’ll be attaching some copper
where we’ll be attaching some copper
where we’ll be attaching some copper lugs to make these we simply take a
lugs to make these we simply take a
lugs to make these we simply take a piece of half-inch copper tubing and use
piece of half-inch copper tubing and use
piece of half-inch copper tubing and use a hacksaw to cut 2 inches from the end
a hacksaw to cut 2 inches from the end
a hacksaw to cut 2 inches from the end half of the tube can be placed in the
half of the tube can be placed in the
half of the tube can be placed in the jaws of a bench vise and when the vise
jaws of a bench vise and when the vise
jaws of a bench vise and when the vise is closed with a significant amount of
is closed with a significant amount of
is closed with a significant amount of force you can see that we’re left with a
force you can see that we’re left with a
force you can see that we’re left with a nice flat end let’s place that on
nice flat end let’s place that on
nice flat end let’s place that on another piece of scrap wood and drill a
another piece of scrap wood and drill a
another piece of scrap wood and drill a 5/32 inch hole so that it penetrates
5/32 inch hole so that it penetrates
5/32 inch hole so that it penetrates through to the other side I’ve done this
through to the other side I’ve done this
through to the other side I’ve done this with four different pieces and to clean
with four different pieces and to clean
with four different pieces and to clean up the rough metal Barb’s I’m using a
up the rough metal Barb’s I’m using a
up the rough metal Barb’s I’m using a belt sander to gently follow at the
belt sander to gently follow at the
belt sander to gently follow at the edges until it looks a little more
edges until it looks a little more
edges until it looks a little more user-friendly this lug here is going to
user-friendly this lug here is going to
user-friendly this lug here is going to attach to a five foot length of 8 gauge
attach to a five foot length of 8 gauge
attach to a five foot length of 8 gauge cable this was leftover from when we
cable this was leftover from when we
cable this was leftover from when we wound our coils
wound our coils
wound our coils we’ll just need to strip about two
we’ll just need to strip about two
we’ll just need to strip about two inches of insulation from the ends to
inches of insulation from the ends to
inches of insulation from the ends to expose the copper wire then bend the
expose the copper wire then bend the
expose the copper wire then bend the wire over with a pair of pliers to form
wire over with a pair of pliers to form
wire over with a pair of pliers to form a little loop the exposed copper loop
a little loop the exposed copper loop
a little loop the exposed copper loop can be slid inside the casing and to
can be slid inside the casing and to
can be slid inside the casing and to make this a permanent connection
make this a permanent connection
make this a permanent connection let’s crimp it onto the cable using the
let’s crimp it onto the cable using the
let’s crimp it onto the cable using the bench vise like we did before this
bench vise like we did before this
bench vise like we did before this connection isn’t coming apart and should
connection isn’t coming apart and should
connection isn’t coming apart and should easily handle the high currents that
easily handle the high currents that
easily handle the high currents that we’ll be exposing it to
we’ll be exposing it to
we’ll be exposing it to the other end of this cable will be our
the other end of this cable will be our
the other end of this cable will be our ground clamp I got this metal clamp for
ground clamp I got this metal clamp for
ground clamp I got this metal clamp for 99 cents and with the rubber tips
99 cents and with the rubber tips
99 cents and with the rubber tips removed
removed
removed it’ll conduct electricity i crimped a
it’ll conduct electricity i crimped a
it’ll conduct electricity i crimped a piece of copper tube to the end of the
piece of copper tube to the end of the
piece of copper tube to the end of the wire and secured it to the clamp with
wire and secured it to the clamp with
wire and secured it to the clamp with the screw the spring and the clamp is
the screw the spring and the clamp is
the screw the spring and the clamp is surprisingly powerful it bites down with
surprisingly powerful it bites down with
surprisingly powerful it bites down with a good amount of pressure and that’s
a good amount of pressure and that’s
a good amount of pressure and that’s what we’ll need for making a firm
what we’ll need for making a firm
what we’ll need for making a firm connection with our workpiece now a
connection with our workpiece now a
connection with our workpiece now a welding rod could just be pinched to the
welding rod could just be pinched to the
welding rod could just be pinched to the cable with a pair of pliers but I went
cable with a pair of pliers but I went
cable with a pair of pliers but I went ahead and spent $13 on a proper
ahead and spent $13 on a proper
ahead and spent $13 on a proper electrode holder this makes it look more
electrode holder this makes it look more
electrode holder this makes it look more like a real welder and adds a tremendous
like a real welder and adds a tremendous
like a real welder and adds a tremendous amount of convenience and control okay
amount of convenience and control okay
amount of convenience and control okay we’ve got our lugs crimped on the ends
we’ve got our lugs crimped on the ends
we’ve got our lugs crimped on the ends of the secondary coils so let’s mount
of the secondary coils so let’s mount
of the secondary coils so let’s mount the Transformers on the base you
the Transformers on the base you
the Transformers on the base you probably notice that I cut the cable in
probably notice that I cut the cable in
probably notice that I cut the cable in the middle and crimp them to a common
the middle and crimp them to a common
the middle and crimp them to a common lug in the center this is because I
lug in the center this is because I
lug in the center this is because I wanted the option to Center tap the
wanted the option to Center tap the
wanted the option to Center tap the Transformers to power other devices like
Transformers to power other devices like
Transformers to power other devices like an electrical arc furnace look for how
an electrical arc furnace look for how
an electrical arc furnace look for how to make that in a different project a
to make that in a different project a
to make that in a different project a few screws can be used to hold the
few screws can be used to hold the
few screws can be used to hold the Transformers in place and the ground and
Transformers in place and the ground and
Transformers in place and the ground and clip can be connected by overlapping the
clip can be connected by overlapping the
clip can be connected by overlapping the respective lugs and pinning them down
respective lugs and pinning them down
respective lugs and pinning them down with a screw the electrode holder gets
with a screw the electrode holder gets
with a screw the electrode holder gets attached in the same way and here you
attached in the same way and here you
attached in the same way and here you can see there’s plenty of separation to
can see there’s plenty of separation to
can see there’s plenty of separation to prevent the terminals from shorting out
prevent the terminals from shorting out
prevent the terminals from shorting out alright let’s get ready to rig up the
alright let’s get ready to rig up the
alright let’s get ready to rig up the electrical system this cord was saved
electrical system this cord was saved
electrical system this cord was saved from one of the microwaves we tore apart
from one of the microwaves we tore apart
from one of the microwaves we tore apart and after exposing the three wires
and after exposing the three wires
and after exposing the three wires inside I’m going to cut off the green
inside I’m going to cut off the green
inside I’m going to cut off the green one just to get it out of the way it’s
one just to get it out of the way it’s
one just to get it out of the way it’s not going to be connected to anything
not going to be connected to anything
not going to be connected to anything now here’s the trick to powering the
now here’s the trick to powering the
now here’s the trick to powering the welder 240 volts AC I can’t recommend
welder 240 volts AC I can’t recommend
welder 240 volts AC I can’t recommend this as the safest way to do it but
this as the safest way to do it but
this as the safest way to do it but here’s how I did it with a couple of
here’s how I did it with a couple of
here’s how I did it with a couple of plugs a connector and some 10 gauge wire
plugs a connector and some 10 gauge wire
plugs a connector and some 10 gauge wire each outlet in my house provides around
each outlet in my house provides around
each outlet in my house provides around 120 volts ac and they’re connected to a
120 volts ac and they’re connected to a
120 volts ac and they’re connected to a circuit breaker bus bar there are two
circuit breaker bus bar there are two
circuit breaker bus bar there are two breaker buses and if a hot lead is taken
breaker buses and if a hot lead is taken
breaker buses and if a hot lead is taken from each of the buses we get 240 volts
from each of the buses we get 240 volts
from each of the buses we get 240 volts now rather than tapping into the breaker
now rather than tapping into the breaker
now rather than tapping into the breaker box directly I ran extension cords to
box directly I ran extension cords to
box directly I ran extension cords to two different wall outlets that were a
two different wall outlets that were a
two different wall outlets that were a hundred and eighty degrees out of phase
hundred and eighty degrees out of phase
hundred and eighty degrees out of phase the extension cords connect to this
the extension cords connect to this
the extension cords connect to this adapter which basically just connects
adapter which basically just connects
adapter which basically just connects the two hot leads together if connected
the two hot leads together if connected
the two hot leads together if connected properly the end result is 240 volts
properly the end result is 240 volts
properly the end result is 240 volts looking at the back of the transformers
looking at the back of the transformers
looking at the back of the transformers you can see four terminals that connect
you can see four terminals that connect
you can see four terminals that connect to the primary coils I used some
to the primary coils I used some
to the primary coils I used some salvaged cables and wire nuts to connect
salvaged cables and wire nuts to connect
salvaged cables and wire nuts to connect a hot lead to one transformer and a hot
a hot lead to one transformer and a hot
a hot lead to one transformer and a hot lead to the other another wire was used
lead to the other another wire was used
lead to the other another wire was used to bridge the two connecting them and
to bridge the two connecting them and
to bridge the two connecting them and series by the way the color of these
series by the way the color of these
series by the way the color of these wires doesn’t mean anything they’re all
wires doesn’t mean anything they’re all
wires doesn’t mean anything they’re all going to be shock hazards okay to finish
going to be shock hazards okay to finish
going to be shock hazards okay to finish up let’s fasten the power cable to the
up let’s fasten the power cable to the
up let’s fasten the power cable to the base so it doesn’t pull the connections
base so it doesn’t pull the connections
base so it doesn’t pull the connections apart if the cable gets jerked around
apart if the cable gets jerked around
apart if the cable gets jerked around it’s extremely important to remember the
it’s extremely important to remember the
it’s extremely important to remember the system has no on/off switch it can only
system has no on/off switch it can only
system has no on/off switch it can only be used with a power controller like the
be used with a power controller like the
be used with a power controller like the scary AK you can see how to build this
scary AK you can see how to build this
scary AK you can see how to build this one in another video if you remember
one in another video if you remember
one in another video if you remember back to when we inserted our new
back to when we inserted our new
back to when we inserted our new secondary coils I mentioned it didn’t
secondary coils I mentioned it didn’t
secondary coils I mentioned it didn’t really matter which way they went in and
really matter which way they went in and
really matter which way they went in and here’s why when the power is on and our
here’s why when the power is on and our
here’s why when the power is on and our welding electrodes are connected to a
welding electrodes are connected to a
welding electrodes are connected to a multimeter we should expect to see
multimeter we should expect to see
multimeter we should expect to see around 36 volts but here we’re only
around 36 volts but here we’re only
around 36 volts but here we’re only getting 2.4 that means the Transformers
getting 2.4 that means the Transformers
getting 2.4 that means the Transformers are canceling each other out
are canceling each other out
are canceling each other out to fix this problem let’s just turn off
to fix this problem let’s just turn off
to fix this problem let’s just turn off the power and remove the connections to
the power and remove the connections to
the power and remove the connections to one of the Transformers it shouldn’t
one of the Transformers it shouldn’t
one of the Transformers it shouldn’t really matter which one then we simply
really matter which one then we simply
really matter which one then we simply switch the connections around that’s it
switch the connections around that’s it
switch the connections around that’s it this time when we turn on the power and
this time when we turn on the power and
this time when we turn on the power and check the voltage we’ve got 37 volts now
check the voltage we’ve got 37 volts now
check the voltage we’ve got 37 volts now rather than leaving all the dangerous
rather than leaving all the dangerous
rather than leaving all the dangerous components exposed I think we can build
components exposed I think we can build
components exposed I think we can build a makeshift casing from this plastic
a makeshift casing from this plastic
a makeshift casing from this plastic container here are the exact
container here are the exact
container here are the exact measurements if you care to know I chose
measurements if you care to know I chose
measurements if you care to know I chose to use the lid as a base and use a
to use the lid as a base and use a
to use the lid as a base and use a rotary tool with a cutting wheel to make
rotary tool with a cutting wheel to make
rotary tool with a cutting wheel to make the surface flat our entire welding
the surface flat our entire welding
the surface flat our entire welding assembly should fit right in the center
assembly should fit right in the center
assembly should fit right in the center without any problems I gave the whole
without any problems I gave the whole
without any problems I gave the whole container a paint job set the bin into
container a paint job set the bin into
container a paint job set the bin into position and locked it into place two
position and locked it into place two
position and locked it into place two holes went in the front for our
holes went in the front for our
holes went in the front for our electrode cables and I also cut some
electrode cables and I also cut some
electrode cables and I also cut some ventilation holes on the sides there’s a
ventilation holes on the sides there’s a
ventilation holes on the sides there’s a hole in the back for the power cable and
hole in the back for the power cable and
hole in the back for the power cable and now our welder is completely finished
now our welder is completely finished
now our welder is completely finished and ready to test
and ready to test
and ready to test let’s start by directly shorting out the
let’s start by directly shorting out the
let’s start by directly shorting out the ground clip with the electrode holder
ground clip with the electrode holder
ground clip with the electrode holder because this will allow the maximum
because this will allow the maximum
because this will allow the maximum amount of current to flow we’ll use an
amount of current to flow we’ll use an
amount of current to flow we’ll use an amp meter to monitor the primary current
amp meter to monitor the primary current
amp meter to monitor the primary current turn on the scary AK and
turn on the scary AK and
turn on the scary AK and power up when the power settles at
power up when the power settles at
power up when the power settles at around 15 and a half amps on the primary
around 15 and a half amps on the primary
around 15 and a half amps on the primary you can see it produces about a hundred
you can see it produces about a hundred
you can see it produces about a hundred amps on the secondary the average is
amps on the secondary the average is
amps on the secondary the average is adjustable so if we add more power we
adjustable so if we add more power we
adjustable so if we add more power we can jump the weld and cables to over 200
can jump the weld and cables to over 200
can jump the weld and cables to over 200 amps in any case there’s certainly
amps in any case there’s certainly
amps in any case there’s certainly enough power available to strike an arc
enough power available to strike an arc
enough power available to strike an arc sustain it and weld some metal you can
sustain it and weld some metal you can
sustain it and weld some metal you can see some of my first few experiences
see some of my first few experiences
see some of my first few experiences with the world of welding in another
with the world of welding in another
with the world of welding in another video well that’s it for now if you like
video well that’s it for now if you like
video well that’s it for now if you like this project perhaps you’ll like some of
this project perhaps you’ll like some of
this project perhaps you’ll like some of my others check them out at the king of
my others check them out at the king of
my others check them out at the king of random calm
random calm
random calm [Music]
”
Be First to Comment