
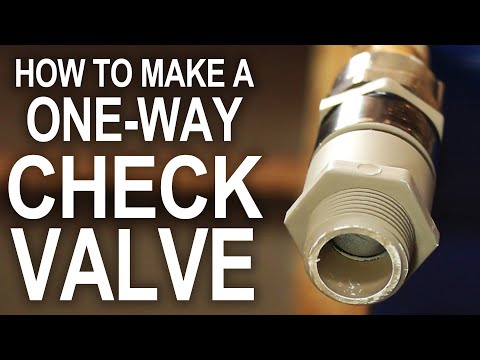
a check valve is an amazing little device that lets a liquid or a gas flow
device that lets a liquid or a gas flow
device that lets a liquid or a gas flow one way only we’ll need something to
one way only we’ll need something to
one way only we’ll need something to make a low cost water pump but buying
make a low cost water pump but buying
make a low cost water pump but buying them can be a little pricey so in this
them can be a little pricey so in this
them can be a little pricey so in this project we’ll be making our own out of
project we’ll be making our own out of
project we’ll be making our own out of common materials and for less than a
common materials and for less than a
common materials and for less than a dollar
for this project I’m using a
for this project I’m using a three-quarter inch male PVC slip adapter
three-quarter inch male PVC slip adapter
three-quarter inch male PVC slip adapter 3/4 inch tubing a three-quarter inch
3/4 inch tubing a three-quarter inch
3/4 inch tubing a three-quarter inch plastic ball and an o-ring I chose this
plastic ball and an o-ring I chose this
plastic ball and an o-ring I chose this adapter because there’s a little ledge
adapter because there’s a little ledge
adapter because there’s a little ledge on the inside where the o-ring can sit
on the inside where the o-ring can sit
on the inside where the o-ring can sit and it should look like this
and it should look like this
and it should look like this the ball needs to be large enough that
the ball needs to be large enough that
the ball needs to be large enough that it won’t push through the throat but
it won’t push through the throat but
it won’t push through the throat but small enough that it doesn’t touch the
small enough that it doesn’t touch the
small enough that it doesn’t touch the sides attaching the tube at this point
sides attaching the tube at this point
sides attaching the tube at this point won’t really do any good because the
won’t really do any good because the
won’t really do any good because the ball will roll right out we need a way
ball will roll right out we need a way
ball will roll right out we need a way to secure it in position so let’s make a
to secure it in position so let’s make a
to secure it in position so let’s make a mark on our tube 5/8 of an inch from the
mark on our tube 5/8 of an inch from the
mark on our tube 5/8 of an inch from the bottom and use a sixteenth inch bit to
bottom and use a sixteenth inch bit to
bottom and use a sixteenth inch bit to drill a small hole in the tube
drill a small hole in the tube
drill a small hole in the tube continuing right on through the other
continuing right on through the other
continuing right on through the other side now you’ll need a strong piece of
side now you’ll need a strong piece of
side now you’ll need a strong piece of metal like a nail or a thick paper clip
metal like a nail or a thick paper clip
metal like a nail or a thick paper clip I’m using one of these Brad nails that
I’m using one of these Brad nails that
I’m using one of these Brad nails that go to my nail gun whatever you use it
go to my nail gun whatever you use it
go to my nail gun whatever you use it needs to be strong and long enough to
needs to be strong and long enough to
needs to be strong and long enough to push all the way through the to the ends
push all the way through the to the ends
push all the way through the to the ends of the nail will need to be flush with
of the nail will need to be flush with
of the nail will need to be flush with the sides of the pipe so we can go ahead
the sides of the pipe so we can go ahead
the sides of the pipe so we can go ahead and clip the end with the nail head on
and clip the end with the nail head on
and clip the end with the nail head on it and now we’ve got ourselves a
it and now we’ve got ourselves a
it and now we’ve got ourselves a retaining bar that’s perfectly flush on
retaining bar that’s perfectly flush on
retaining bar that’s perfectly flush on both sides the next step is to prime our
both sides the next step is to prime our
both sides the next step is to prime our connections and place the o-ring in
connections and place the o-ring in
connections and place the o-ring in place inside the adapter now let’s drop
place inside the adapter now let’s drop
place inside the adapter now let’s drop in the ball and double check that
in the ball and double check that
in the ball and double check that everything seals properly PVC cement is
everything seals properly PVC cement is
everything seals properly PVC cement is added to the pipe making sure it covers
added to the pipe making sure it covers
added to the pipe making sure it covers the holes where the nail is set then the
the holes where the nail is set then the
the holes where the nail is set then the pipe is pushed down to the point where
pipe is pushed down to the point where
pipe is pushed down to the point where the holes dip just below the rim of the
the holes dip just below the rim of the
the holes dip just below the rim of the adapter so when the glue sets this
adapter so when the glue sets this
adapter so when the glue sets this connection will be completely airtight
connection will be completely airtight
connection will be completely airtight you can build this valve into any length
you can build this valve into any length
you can build this valve into any length of PVC pipe you want but I’m using this
of PVC pipe you want but I’m using this
of PVC pipe you want but I’m using this one and a half inch piece because it’s
one and a half inch piece because it’s
one and a half inch piece because it’s just long enough to accept another
just long enough to accept another
just long enough to accept another adapter when it’s glued and pushed
adapter when it’s glued and pushed
adapter when it’s glued and pushed together it makes a nice little compact
together it makes a nice little compact
together it makes a nice little compact unit the only a slight gap separating
unit the only a slight gap separating
unit the only a slight gap separating the two ends I took the opportunity to
the two ends I took the opportunity to
the two ends I took the opportunity to make four of these valves and a visual
make four of these valves and a visual
make four of these valves and a visual inspection on the inside shows that the
inspection on the inside shows that the
inspection on the inside shows that the ball and oring are still seated properly
ball and oring are still seated properly
ball and oring are still seated properly in place and the retention bar is
in place and the retention bar is
in place and the retention bar is keeping it all together to finish up I
keeping it all together to finish up I
keeping it all together to finish up I gave these a quick paint job and wrapped
gave these a quick paint job and wrapped
gave these a quick paint job and wrapped one end with a bit of electrical tape to
one end with a bit of electrical tape to
one end with a bit of electrical tape to indicate the direction of flow similar
indicate the direction of flow similar
indicate the direction of flow similar to the marking you’d find on an
to the marking you’d find on an
to the marking you’d find on an electrical diode
electrical diode
electrical diode a fluid can pass freely in one direction
a fluid can pass freely in one direction
a fluid can pass freely in one direction but if the valve is turned around the
but if the valve is turned around the
but if the valve is turned around the pressure closes the valve and the fluid
pressure closes the valve and the fluid
pressure closes the valve and the fluid is blocked the quality of the seal can
is blocked the quality of the seal can
is blocked the quality of the seal can be tested by giving the pressurized
be tested by giving the pressurized
be tested by giving the pressurized valve in a bowl of water this will show
valve in a bowl of water this will show
valve in a bowl of water this will show us if any air is escaping at all the
us if any air is escaping at all the
us if any air is escaping at all the pressure can be released though by
pressure can be released though by
pressure can be released though by pushing up on the inside of the valve to
pushing up on the inside of the valve to
pushing up on the inside of the valve to break the seal between the ball and the
break the seal between the ball and the
break the seal between the ball and the o-ring I tried using a couple of these
o-ring I tried using a couple of these
o-ring I tried using a couple of these valves to make a hand pump which you’ll
valves to make a hand pump which you’ll
valves to make a hand pump which you’ll be able to find in another project it’ll
be able to find in another project it’ll
be able to find in another project it’ll compress air and move water at over five
compress air and move water at over five
compress air and move water at over five gallons per minute you can even create
gallons per minute you can even create
gallons per minute you can even create enough suction to form a makeshift
enough suction to form a makeshift
enough suction to form a makeshift vacuum pump the threaded ends of the
vacuum pump the threaded ends of the
vacuum pump the threaded ends of the valve make them easy to connect replace
valve make them easy to connect replace
valve make them easy to connect replace or rearrange whenever needed
or rearrange whenever needed
or rearrange whenever needed just for curiosity let’s pressure test
just for curiosity let’s pressure test
just for curiosity let’s pressure test the valve by hooking it up to an air
the valve by hooking it up to an air
the valve by hooking it up to an air compressor using this pneumatic adapter
compressor using this pneumatic adapter
compressor using this pneumatic adapter that we made in the rocket rifle project
that we made in the rocket rifle project
that we made in the rocket rifle project the system set at 20 psi and you can see
the system set at 20 psi and you can see
the system set at 20 psi and you can see the valve closed off and prevent any air
the valve closed off and prevent any air
the valve closed off and prevent any air from leaking when I crank it up to 50
from leaking when I crank it up to 50
from leaking when I crank it up to 50 psi the pressure difference is a little
psi the pressure difference is a little
psi the pressure difference is a little more obvious by the compression of the
more obvious by the compression of the
more obvious by the compression of the o-ring and I’m really impressed at how
o-ring and I’m really impressed at how
o-ring and I’m really impressed at how well it works as an alternative I found
well it works as an alternative I found
well it works as an alternative I found that a rubber bouncy ball could replace
that a rubber bouncy ball could replace
that a rubber bouncy ball could replace the entire valve mechanism for low
the entire valve mechanism for low
the entire valve mechanism for low pressure applications since the ball is
pressure applications since the ball is
pressure applications since the ball is rubber
rubber
rubber you don’t need an o-ring to seal the
you don’t need an o-ring to seal the
you don’t need an o-ring to seal the fork to make it work just grab a sharp
fork to make it work just grab a sharp
fork to make it work just grab a sharp knife and a cutting board and begin
knife and a cutting board and begin
knife and a cutting board and begin cutting the top third of the ball very
cutting the top third of the ball very
cutting the top third of the ball very slowly until you slice right through it
slowly until you slice right through it
slowly until you slice right through it now reinsert the ball with the round
now reinsert the ball with the round
now reinsert the ball with the round side facing down and simply slide the
side facing down and simply slide the
side facing down and simply slide the tube in overtop amazingly it’s that easy
tube in overtop amazingly it’s that easy
tube in overtop amazingly it’s that easy and my kids use it for blowing up
and my kids use it for blowing up
and my kids use it for blowing up balloons
balloons
balloons well there’s how to make some useful
well there’s how to make some useful
well there’s how to make some useful pressure rated check valves for as
pressure rated check valves for as
pressure rated check valves for as little as 35 cents if you liked this
little as 35 cents if you liked this
little as 35 cents if you liked this project perhaps you’ll like some of my
project perhaps you’ll like some of my
project perhaps you’ll like some of my others check them out at the king of
others check them out at the king of
others check them out at the king of random calm
random calm
random calm [Music]
”
Be First to Comment